In this tutorial, I’m going to show you how to use a green screen all the way from lighting it, to the editing process. This is an in-depth tutorial to leave any confusion behind and ensure you get great photography every time you use a green screen.
You use green screens to enable you to place people or objects into different scenes very easily. This will be a great tutorial for anyone looking to use this technique for photoshop composites, stock photography, product photography or just to put people into different backgrounds.
In this tutorial:
Video Timestamps:
00:02 Intro | 00:10 What you will need | 00:44 Setting up the lights | 02:00 Exposing correctly for the background | 04:05 Exposing correctly for your model | 07:30 Taking pictures of the model | 09:20 Using Photoshop for the edit | 10:30 Separating the green background from the model | 17:03 Removing the green screen in Photoshop | 17:30 Refining the cut out | 22:49 Adding different backgrounds | 25:16 How to make your model sit more naturally in the backgrounds you choose | 32:17 Conclusion
Simply put, green screens are used so that you can replace the background with any scene you like. Let's start by talking to you about what you need. You’ll need a green screen in a colour that’s called ‘chroma green’. There are lots of different versions out there, but my recommendation is to get the paper roll ones because they are the smoothest, and the smoother you make your green screen, the easier it is to edit.
Get access to ALL our online courses – 1000’s of videos, worksheets, critiques of student’s work, personalised support and much more with our monthly membership.
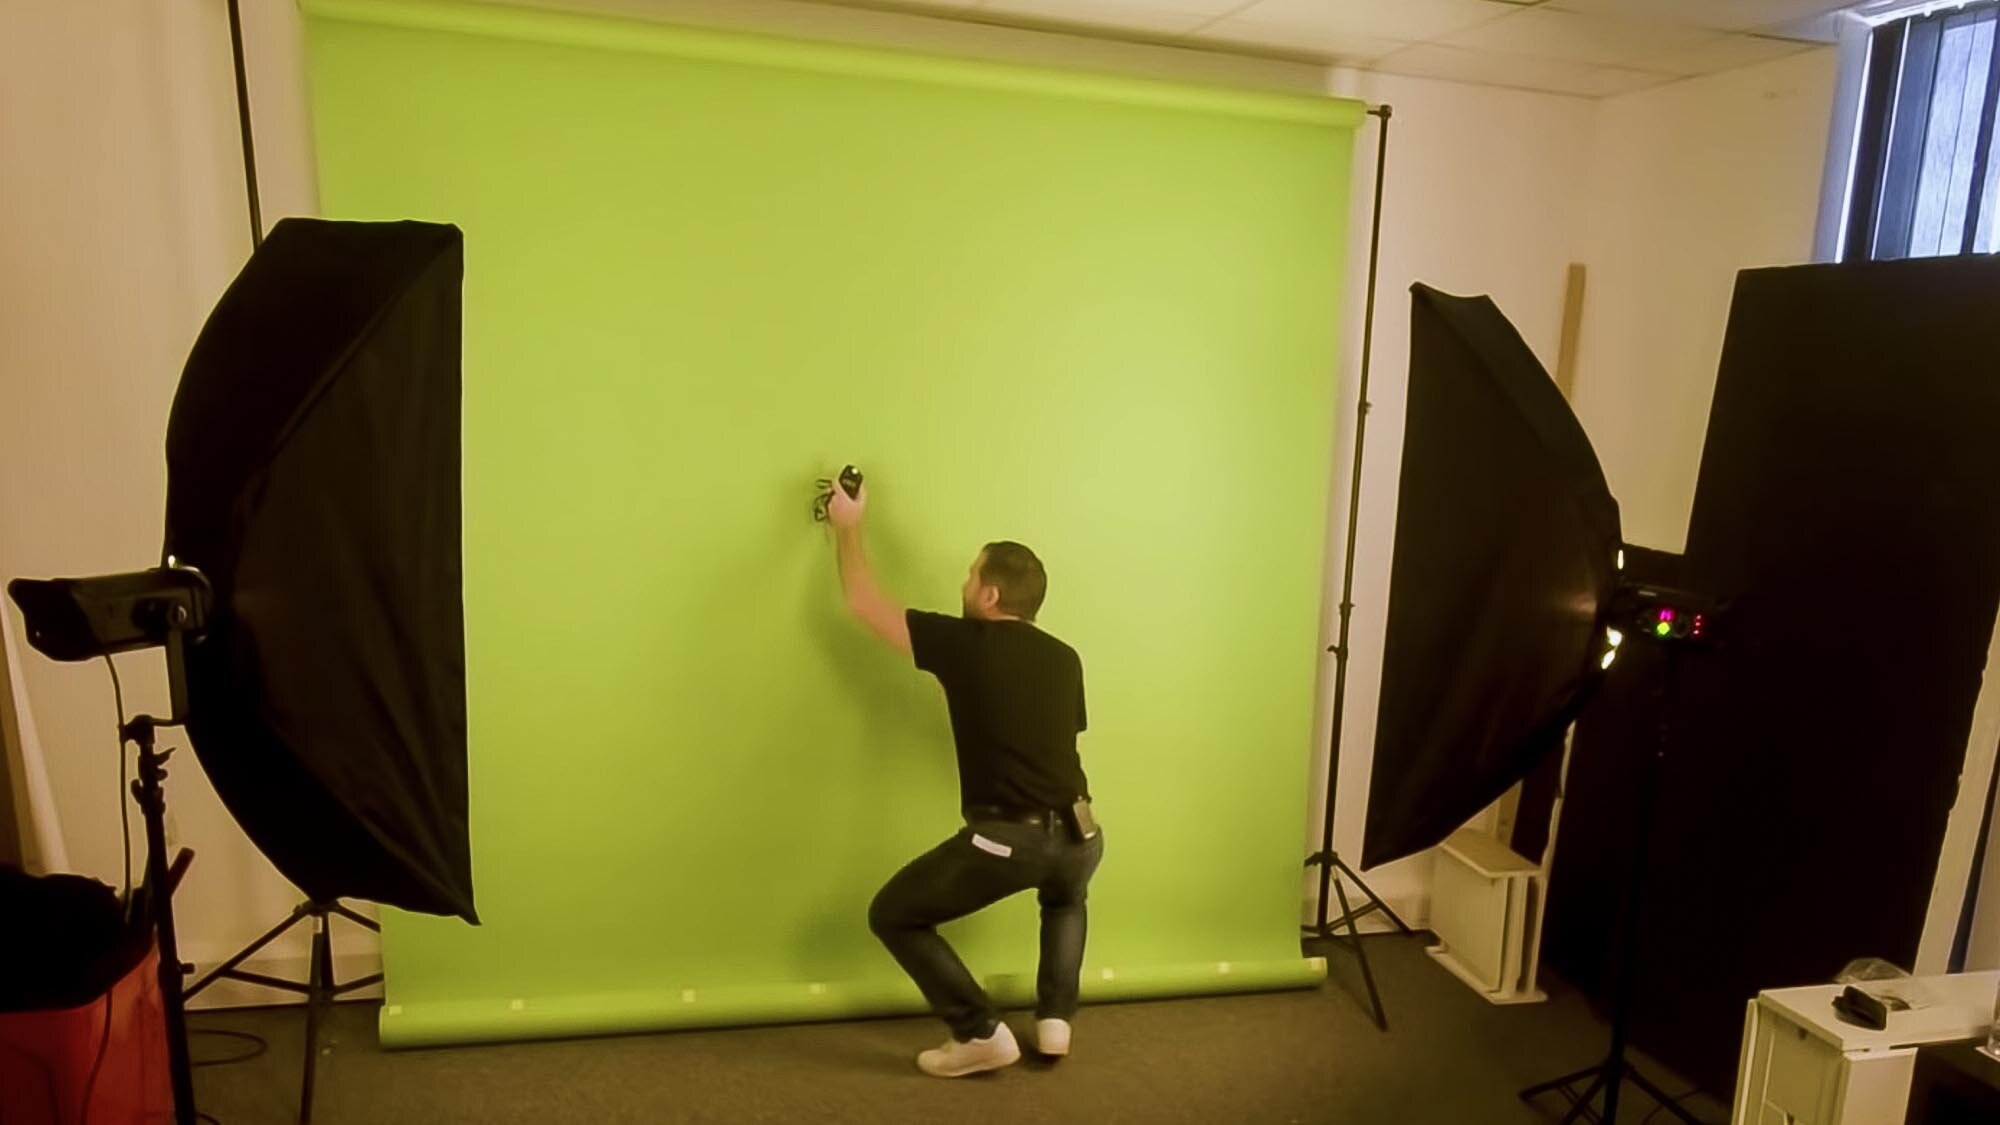
To light your green screen you will need soft light evenly spread over it. This can be done with LED or flash lighting but with either light source, you will need some kind of diffuser to make it soft. In the video, I’m using two soft boxes on flashlights to spread soft light across the background evenly.
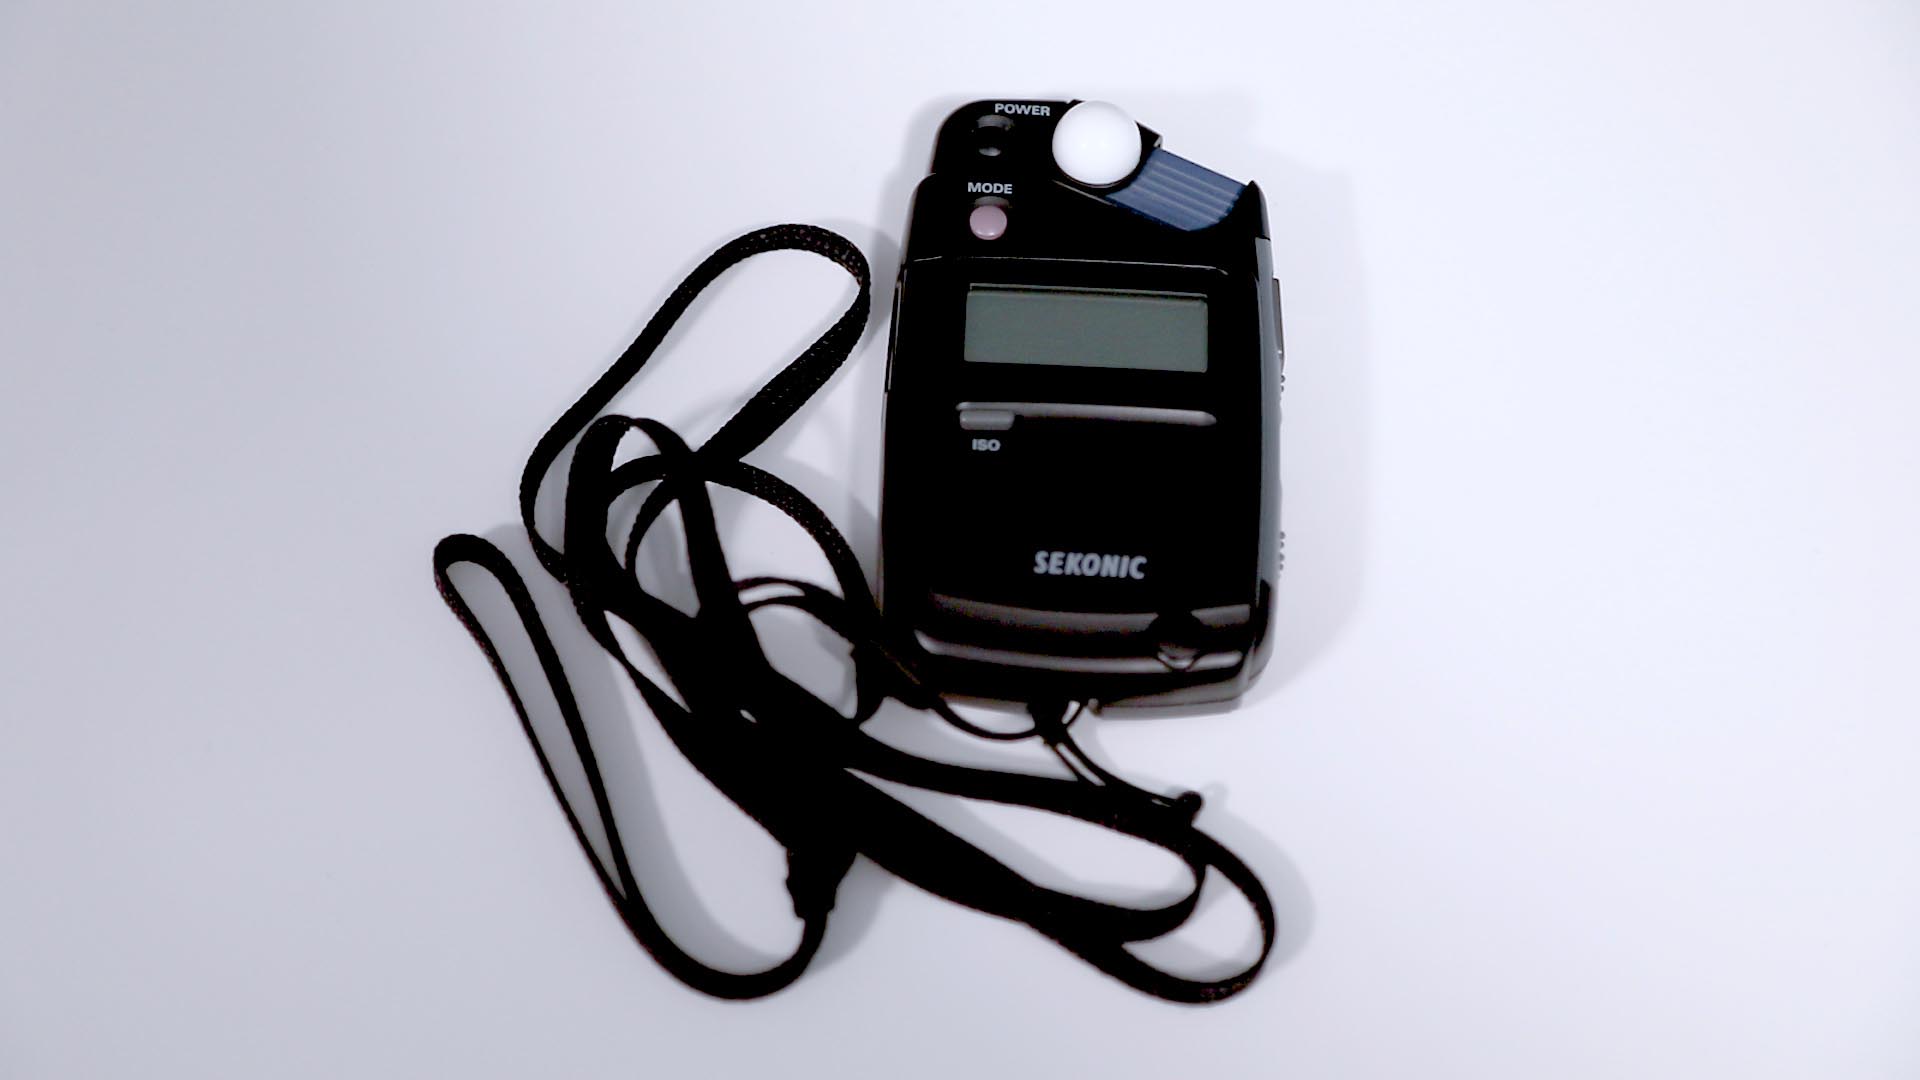
You will need to do an exposure test to make sure the light is even across all of the background. To do this with flash lighting, you will need a remote trigger to fire off the flashes and a light meter to measure the light across the whole green screen.
Adjust the lights by using turning the power up or down and moving them around appropriately. If you are doing this for the first time, then an even metering of around f/8 across the whole background is recommended. In my example, the background exposure was f/8 ½. To learn more about metring flash lighting in photography, click here.
Now you have your background evenly lit, you need to get the lighting correct for your model. For this, you need to get the exposure slightly darker than the background. This will ensure the background is brighter and get rid of any dark areas that will be hard to remove in post. For instance, if the exposure for the background is f/8 ½ you will want the exposure of the model to be slightly darker at f/8.
There are also some essential things you will need to do to ensure you have a clean cut out in the next stage.
1. Make sure the model is standing in front of the background lights - that's really important because you don't want the background lights to be hitting the model.
2. Use suitable lighting to light the model. I'm using a white brolly to give me a reflected soft light that is spread quite wide. I'm doing that because I want general stock shots so I can place the model into any picture that I want.
If you are doing it for a specific image, you are going to need to match the look of that image. E.g. is it harsh light, is the light coming from the left or right etc. Figure this out before hand and adjust your lights to match. To learn how to create soft and hard light, click here.
To get the correct exposure for the model, you need to take a meter reading where the model will be standing and turn the power of the light up or down to suit. In my example, I made the model’s exposure f/8 which means the background is half a stop brighter than the foreground. To learn about stops in photography, click here.